Introducing a New Wizard for Platformatic DB
In this article, we will explore how to deploy an application built with Platformatic DB, a powerful tool that simplifies API development by automatically generating OpenAPI and GraphQL documentation from your database, using Platformatic Cloud.
Overview of Platformatic Cloud
Platformatic’s cloud environment allows users to efficiently deploy Node.js applications with out-of-the-box GraphQL and OpenAPI documentation, while also providing preview URLs for pull requests, simplifying the process of testing and reviewing changes before they are merged into your main codebase. It also offers real-time metrics allowing you to monitor and analyze API performance without requiring additional code.
So how does it work?
By utilizing Platformatic's GitHub action, developers can push their code to GitHub and receive an instant deployment of their changes, along with a preview link for testing. This simplifies the deployment process, reducing manual steps and automating the setup of the preview environment.
Overview of Platformatic DB
Platformatic DB allows users to create both OpenAPI and GraphQL schemas from your database, without having to write a single line of code.
Platformatic DB allows for high levels of customization through Node.js and Fastify plugins, and supports various databases, including SQLite, MySQL, MariaDB, and PostgreSQL, giving you the freedom to choose the database that best suits your project requirements.
Ready to get started?
Setting up the Development Environment
Prerequisites
Before diving into the Platformatic cloud, ensure you have the following installed on your local machine;
Node.js >= v18.8.0 or >= v19.0.0
A code editor (e.g., Visual Studio Code or Sublime Text)
Creating Your Cloud App
To get started, you’ll need a GitHub repository set up for your application. If you haven't done so yet, create a GitHub repository for your project before proceeding with the following steps.
To create a GitHub repository:
In the upper-right corner of any Github page, select "New repository" in the drop-down menu.

Enter a short name for your repository. For example,
test-platformatic

Optionally, add a description of your repository.
Choose a repository visibility. For more information, see "About repositories."
Click "Create repository".
Now let’s get started.

1. Access Platformatic Cloud Dashboard: First, log in to your Platformatic Cloud account or sign up if this is your first time using Platformatic Cloud.

2. Creating Your First App: In the Platformatic Cloud dashboard, navigate to the "Apps" section and click on "Create an App". This will initiate a guided wizard to assist you.

3. Authorize Plaformatic Cloud to act on your behalf: This will be asked only once, and allows Platformatic to check on which organizations the Platformatic Cloud app is installed (see next steps).

4. Select Organization and Github Repository: In “select Github Repository” you will see the organizations that you have access to, on which the Platformatic Cloud GitHub application is installed. If there are none, select “Add GitHub Account”.

This will open a window to install Platformatic Cloud, which also specifies on which repositories Platformatic Cloud is authorized.
If you are asked to, you’ll need to select the organization on which to install Cloud (this happens if the user is in more than one organization), then select the repository.
Click on “Install" when done:

5. Select GitHub Repository: You can now select the GitHub repository where your Node.js application resides. Platformatic Cloud will automatically detect the main branch for production deployments.

6. Name Your App: Give your app a meaningful and descriptive name. This name will be used to identify your app within Platformatic Cloud. In this case “Platformatic-App” is suitable.

7. Configure DB Settings: Configuring your database is a crucial step in the deployment process. In this tutorial, we will skip this step as we are assuming you have already configured your database settings in the initial project setup.
In the manual deployment process, you would simply need to enter the desired Database Connection String or input the database information manually. The Platformatic Cloud wizard provides an intuitive interface to guide you through this configuration.
To proceed with your deployment without configuring the database in this tutorial, we can simply click "Skip this step".

8. Create Migration: If you skip this step, the wizard will create a “default” migration that can be used for test purposes. However, it’s possible to ask Platformatic to create a migration describing the DB we want to have. You can do this by selecting a DB and writing a few sentences in natural language, as shown below:

Clicking on “Generate DDL” will produce a text with DDL, which can be accepted or edited (or recreated):

Once you are satisfied with the DDL, you can click on “Use this DDL”.
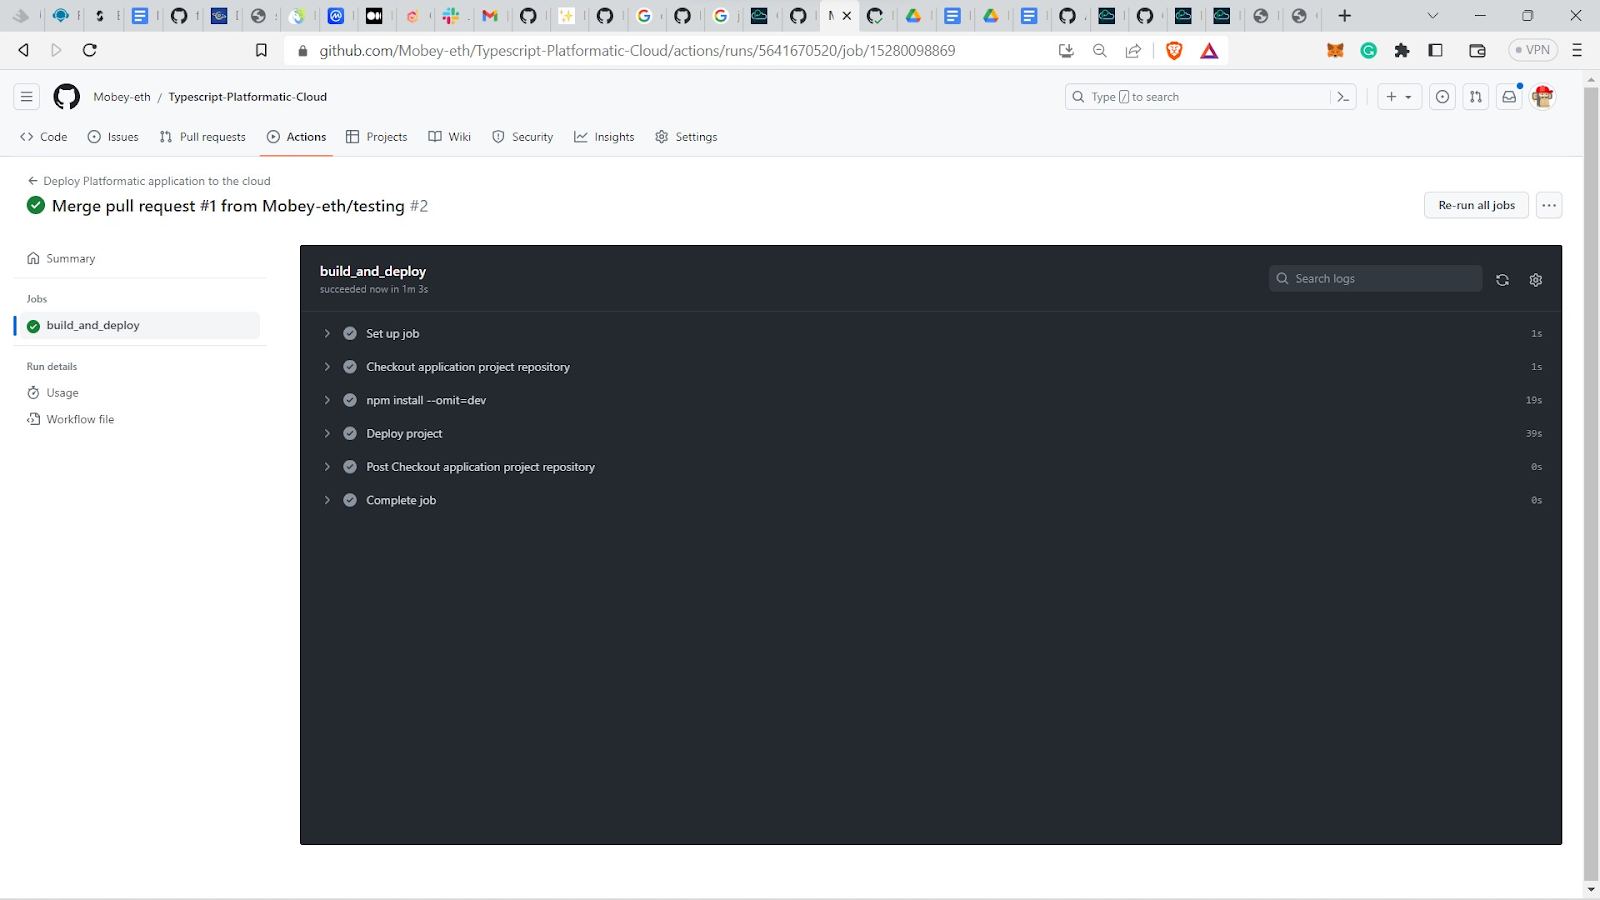
Congratulations! 🎉 You've successfully created your first app in Platformatic Cloud and integrated it with GitHub. With this seamless integration, you can enjoy automatic deployments whenever you push updates to your GitHub repository. Platformatic Cloud's dashboard also provides you with live metrics for each Pull Request deployment, giving you insights into your API's performance.

Remember, Platformatic Cloud does the heavy lifting, allowing you to focus on building and refining your Node.js application. The cloud environment ensures that your app is always accessible and scalable, with pull request previews for seamless testing before merging.
Now that your Node.js application is deployed on Platformatic Cloud, let's explore how to monitor and optimize your application in the cloud environment.
Testing the Cloud Environment
After successfully deploying your Node.js application to Platformatic Cloud, you will be provided with an Entry Point link.
This link serves as the public endpoint for your application, making it accessible to users and other systems. When users visit this URL, they can interact with your application.

Additionally, the Entry Point link enables collaboration among team members. You can easily share this link with other developers or clients, allowing them to preview the deployed application and provide valuable feedback before the application is officially released.
To continue, click on your Entry Point link and then click on GraphiQL:

To demonstrate the use of GraphQL and Platformatic DB in your application, we can create some sample data for a pet shop database using the provided GraphQL code. This code consists of two basic operations: a mutation to save a new pet and a query to fetch all pets.
First, let's create a mutation to save a pet with the name "doggie" and a price of 100:
mutation {
  savePet(input: { name: "doggie", price: 100 }) {
    id
  }
}
This GraphQL mutation will send a request to the server to save the new pet into the database. Next, let's create a query to fetch all pets from the database:
query {
  pets {
    id
    price
  }
}
This GraphQL query will request the server to fetch all pets from the database and return their respective ID and name/price fields.

After executing these GraphQL operations, you should see a response containing the ID of the newly saved pets and a list of pets with their respective IDs, names and prices.
Monitoring and Optimizing your Cloud Application
Monitoring and optimizing your cloud application is essential to ensure its performance, stability, and scalability. Platformatic Cloud provides monitoring features to help you keep track of your application's health and performance metrics.
To further explore and manage your app, navigate to the Platformatic Cloud dashboard, and click on the app you previously created to access the following features:
Live Metrics: Monitor your API's live metrics for each deployment. This includes information on response times, error rates, and resource utilization. The live metrics allow you to quickly identify and address any potential issues and optimize your application's performance.

Logs: Platformatic Cloud provides detailed logs for each deployment, giving you valuable insights into the behavior of your application. You can use these logs to troubleshoot issues, track user activity, and analyze performance trends over time.
Adding CORS Support for Platformatic Cloud
To enable Cross-Origin Resource Sharing (CORS) for your Platformatic Cloud application, you can use the "cors" field in the
platformatic.db.jsonfile. CORS is essential for allowing your application to interact with APIs and resources from different domains.To add CORS support to your Platformatic Cloud application, locate the
platformatic.db.jsonfile in your project's root directory and paste the following configuration code to enable CORS on your cloud application.{ "$schema": "https://platformatic.dev/schemas/v0.28.1/db", "server": { "hostname": "{PLT_SERVER_HOSTNAME}", "port": "{PORT}", "logger": { "level": "{PLT_SERVER_LOGGER_LEVEL}" }, "cors": { "origin": "https://platformatic.cloud", "methods": ["GET", "POST", "PUT", "DELETE"] } }, "db": { "connectionString": "{DATABASE_URL}", "graphql": true, "openapi": true }, "watch": { "ignore": [ "*.sqlite", "*.sqlite-journal" ] }, "migrations": { "dir": "migrations" }, "plugins": { "paths": [ "plugin.ts" ] }, "types": { "autogenerate": true } }After adding the CORS configuration, save the
platformatic.db.jsonfile.Commit the updated
platformatic.db.jsonfile to your GitHub repository and push the changes. Platformatic Cloud will automatically detect the changes and trigger a new deployment with CORS support enabled.Wrapping up
By following the simple steps outlined in this article, you can quickly set up and create an application on Platformatic Cloud, and configure essential settings like environment variables and database connections. The user-friendly interface and AI-powered migrations make the entire process smooth and hassle-free.
You can monitor the performance and metrics of your app directly from the Platformatic Cloud dashboard upon deployment. With built-in support for OpenAPI and GraphQL documentation, testing your API becomes effortless. Additionally, the CORS support provided by Platformatic Cloud ensures secure interfacing with external APIs and resources, enhancing the overall user experience and expanding the use cases of your application.
Get started with Platformatic
Build robust Node.js apps with our open-source tools
Deploy your apps with Platformatic Cloud Free
Join our community on Discord